Connecting to and using the software library
On-Campus:
Connect to either the ethernet or eduroam to access the Software Library.
Off-Campus:
Connect to the College VPN before proceeding.
Drive Mapping Instructions:
Windows 10
1. Click on the Start Menu, in the search box - type This PC
2. Click computer on the top of page, then click on Map Network Drive.
3. Select a drive letter, and type in the following file path:
\\ccnas\software
4. Uncheck the "Reconnect at logon" box. If kept checked your computer will map itself to this drive every time you log in to your computer.
5. Click OK and then click Finish.
6. The software library will now appear as a network drive in "Computer."
Windows 11
1. Open File Explorer from the taskbar, the Start menu, or press the Windows logo key + E.
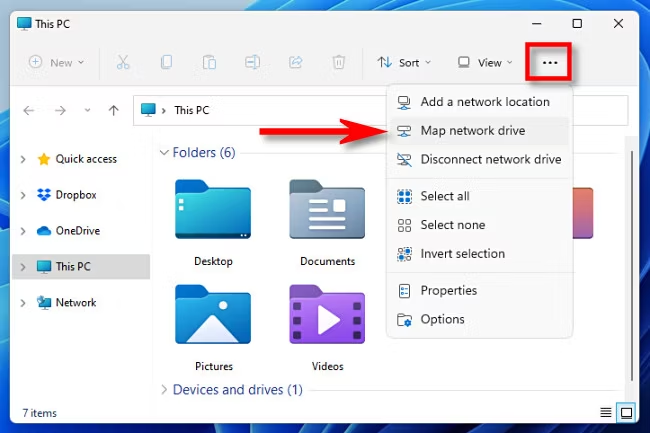
2. In the left panel select This PC. In the top bar of the window click the three horizontal dots then select Map Network Drive as shown below.

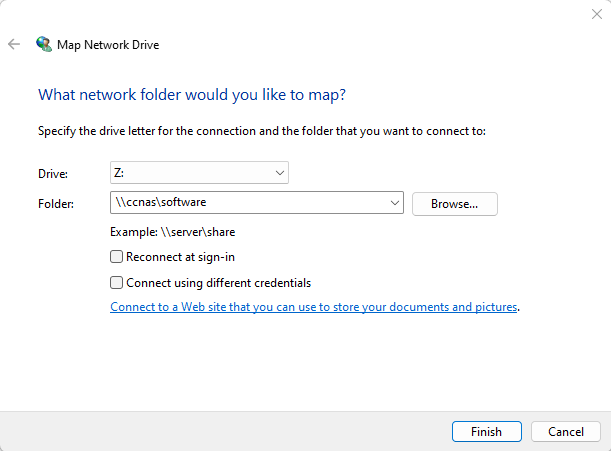
3. In the Drive list, select a drive letter. (Any available letter will do.)
4. In the Folder box, type \\ccnas\software as shown below then click Finish.

***Please remember to read the Read Me text file before installing software so you install it correctly.
Mac
1. On the menu bar, click “Go” and then “Connect to Server.”
 ?
?
Type smb://ccnas/software
and click “Connect.”
2. In the authentication window that pops up, input your Conn username/password, as well as the domain CONNCOLL, if it is not already filled in.
3. The drive will be mapped and an icon will appear on your desktop that will allow you to access the files.